Anyone who uses a computer, whether for work, school, or fun, needs to know how to take pictures. There are several quick and easy ways to capture your screen in Windows 11, including using keyboard keys. With these keyboard shortcuts, you can easily take screenshots without any additional software. With just a few keystrokes, you can record what’s on your screen. This guide will show you how to use keyboard shortcuts to take screenshots in Windows 11, so you can get the exact picture you need when you need it.

Getting to the Print Screen Key
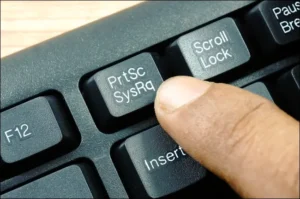
The Print Screen key, which is often marked as PrtScn on your keyboard, is the easiest way to take a picture in Windows 11. When you press this key, the whole screen is copied to your clipboard. If you press Ctrl + V, you can put the screenshot into an image editor or a document. This is the best way to quickly record and share what’s on your screen without having to save it right away.
Getting the current window
You can use the shortcut Alt + PrtScn to take a picture of just the current window instead of the whole screen. This combination copies the window that is currently open to your clipboard. To paste the picture into an image editor or document, press Ctrl + V, just like when you print the screen. This tool is especially helpful when you want to concentrate on a certain app or window without being distracted by other things on the screen.
Putting a screenshot in a file
The Windows + PrtScn shortcut in Windows 11 lets you save screenshots straight to a file to those who prefer to do so. If you press these keys at the same time, your screen will dim for a moment to show that you have taken a picture. The picture is saved immediately in the Screenshots folder in the Pictures library. Users who need to take more than one screenshot without having to save each one individually will love this way.
Getting More Control with the Snipping
Tool Microsoft Windows 11 comes with a tool called Snipping Tool that gives you more ways to take screenshots. To get to the Snipping Tool, press Windows + Shift + S. This combination opens a small menu at the top of the screen with four snipping options: Full-Screen Snip, Freeform Snip, Rectangular Snip, and Window Snip.
After choosing the snipping mode you like best, you can click and drag to pick the part of the screen you want to save. The photo will be copied to your clipboard, and you’ll see a message that lets you use the Snipping Tool interface to make notes on or save the picture. This way is great for people who want to capture more things with more freedom and control.
How to Use the Xbox
Game Bar to Take Screenshots There is a built-in screenshot tool in the Xbox Game Bar for gamers and other people who need to take pictures during games or apps. Pressing Windows + G will bring up the Game Bar. To take a picture of the current game or app window, open the Game Bar and click on the camera icon or press Windows + Alt + PrtScn. The photos are saved in the Videos folder under Captures, which makes it easy to share them or change them later.
Making notes on screenshots
You can make notes on your pictures after you take them with Windows + Shift + S or the Snipping Tool. As soon as you catch the area you want, a message will show up telling you to click on it to open the screenshot in the Snipping Tool. Before you save or share your screenshot, you can use this to draw, write, or mark important parts of it. This feature is especially helpful for making content that teaches or giving comments on documents.
Conclusion
There are many built-in tools and options in Windows 11 that make it easy to take screenshots. There is a way for everyone to capture the screen, whether you want to capture the whole thing, a certain window, or a unique area. You can be more productive and speed up your work by learning these tools. This will also make it easier to capture and share important information. Taking screenshots will become a natural part of how you use your computer after some practice. This will help you document and share more clearly.
